Photography is about light, light and light again. Conveniently, the brightest light is available for free with the sun and (mostly) just shines in the sky during the day. But if you were to just kind of shoot towards the sun with your camera, you a) won’t see much in the photo because it’s completely overexposed and b) probably won’t get a sun star. So why is that and what would you need to consider in order to create sun stars? Well, fortunately not that much.
## Three tips how to create sun stars
I want to show you the three most important camera settings and techniques you can use to successfully get sun stars:
- The aperture: The actual sun star is created by closing the aperture as wide as possible, i.e. very little light falls through the small aperture onto the camera’s sensor. So use a relatively large aperture number (I always have quite good experiences with apertures of 13, 14 or even 16). If the aperture is too wide open (so you set a smaller f-number, for example 5.6), you won’t get a sun star. This can also lead to nice effects, but in this case it is not what we would like to achieve. It’s best to experiment a bit here, because too large aperture numbers can unfortunately also result in increased diffraction blur on the final image.
- The right time: Sounds quite simple, but sometimes it’s a bit tricky. Especially when photographing a sun star at sunrise or sunset, you only have a short time range in which the star looks really beautiful. A good time to press the shutter button is when the sun is only visible or only about 10-20% visible (for example, coming out from behind a mountain ridge). You can also vary this a bit by your personal position – one to two meters can make the difference between success and failure for beautiful sun stars.
- The right focal length: No, you don’t need a professional camera with a lens that costs at least four figures. However, it is important that you use a rather wide-angle focal length for the lens. I have had good experience with a maximum of 50 mm (in 35 mm equivalent), but focal lengths between 15 and 35 mm are certainly ideal, i.e. the classic wide-angle lens. Many smartphone cameras have such focal lengths built in, nevertheless sun stars succeed better with a classic camera, because on the one hand the aperture cannot be changed with many smartphone cameras and on the other hand the aperture often also has fewer slats. However, the number of aperture blades plays a significant role in the effect of sun stars.
And then all you really need to do is catch a sunny day and practice a bit. But beware: in supposedly sunny but slightly diffuse weather you will have a hard time photographing a sun star. This usually only works when the view is really clear. Also make sure that your exposure (using the histogram in the camera) is not too bright or too dark. Normally this is not so important with a sun star, because the sun does not have its full power and brightness.
By the way, the exposure time plays only a minor role when photographing sun stars, and anything less than one second will have no influence on the image. Make sure that your lens is 100% clean and there are no dust particles visible, because they will inevitably lead to disturbing lens flares.
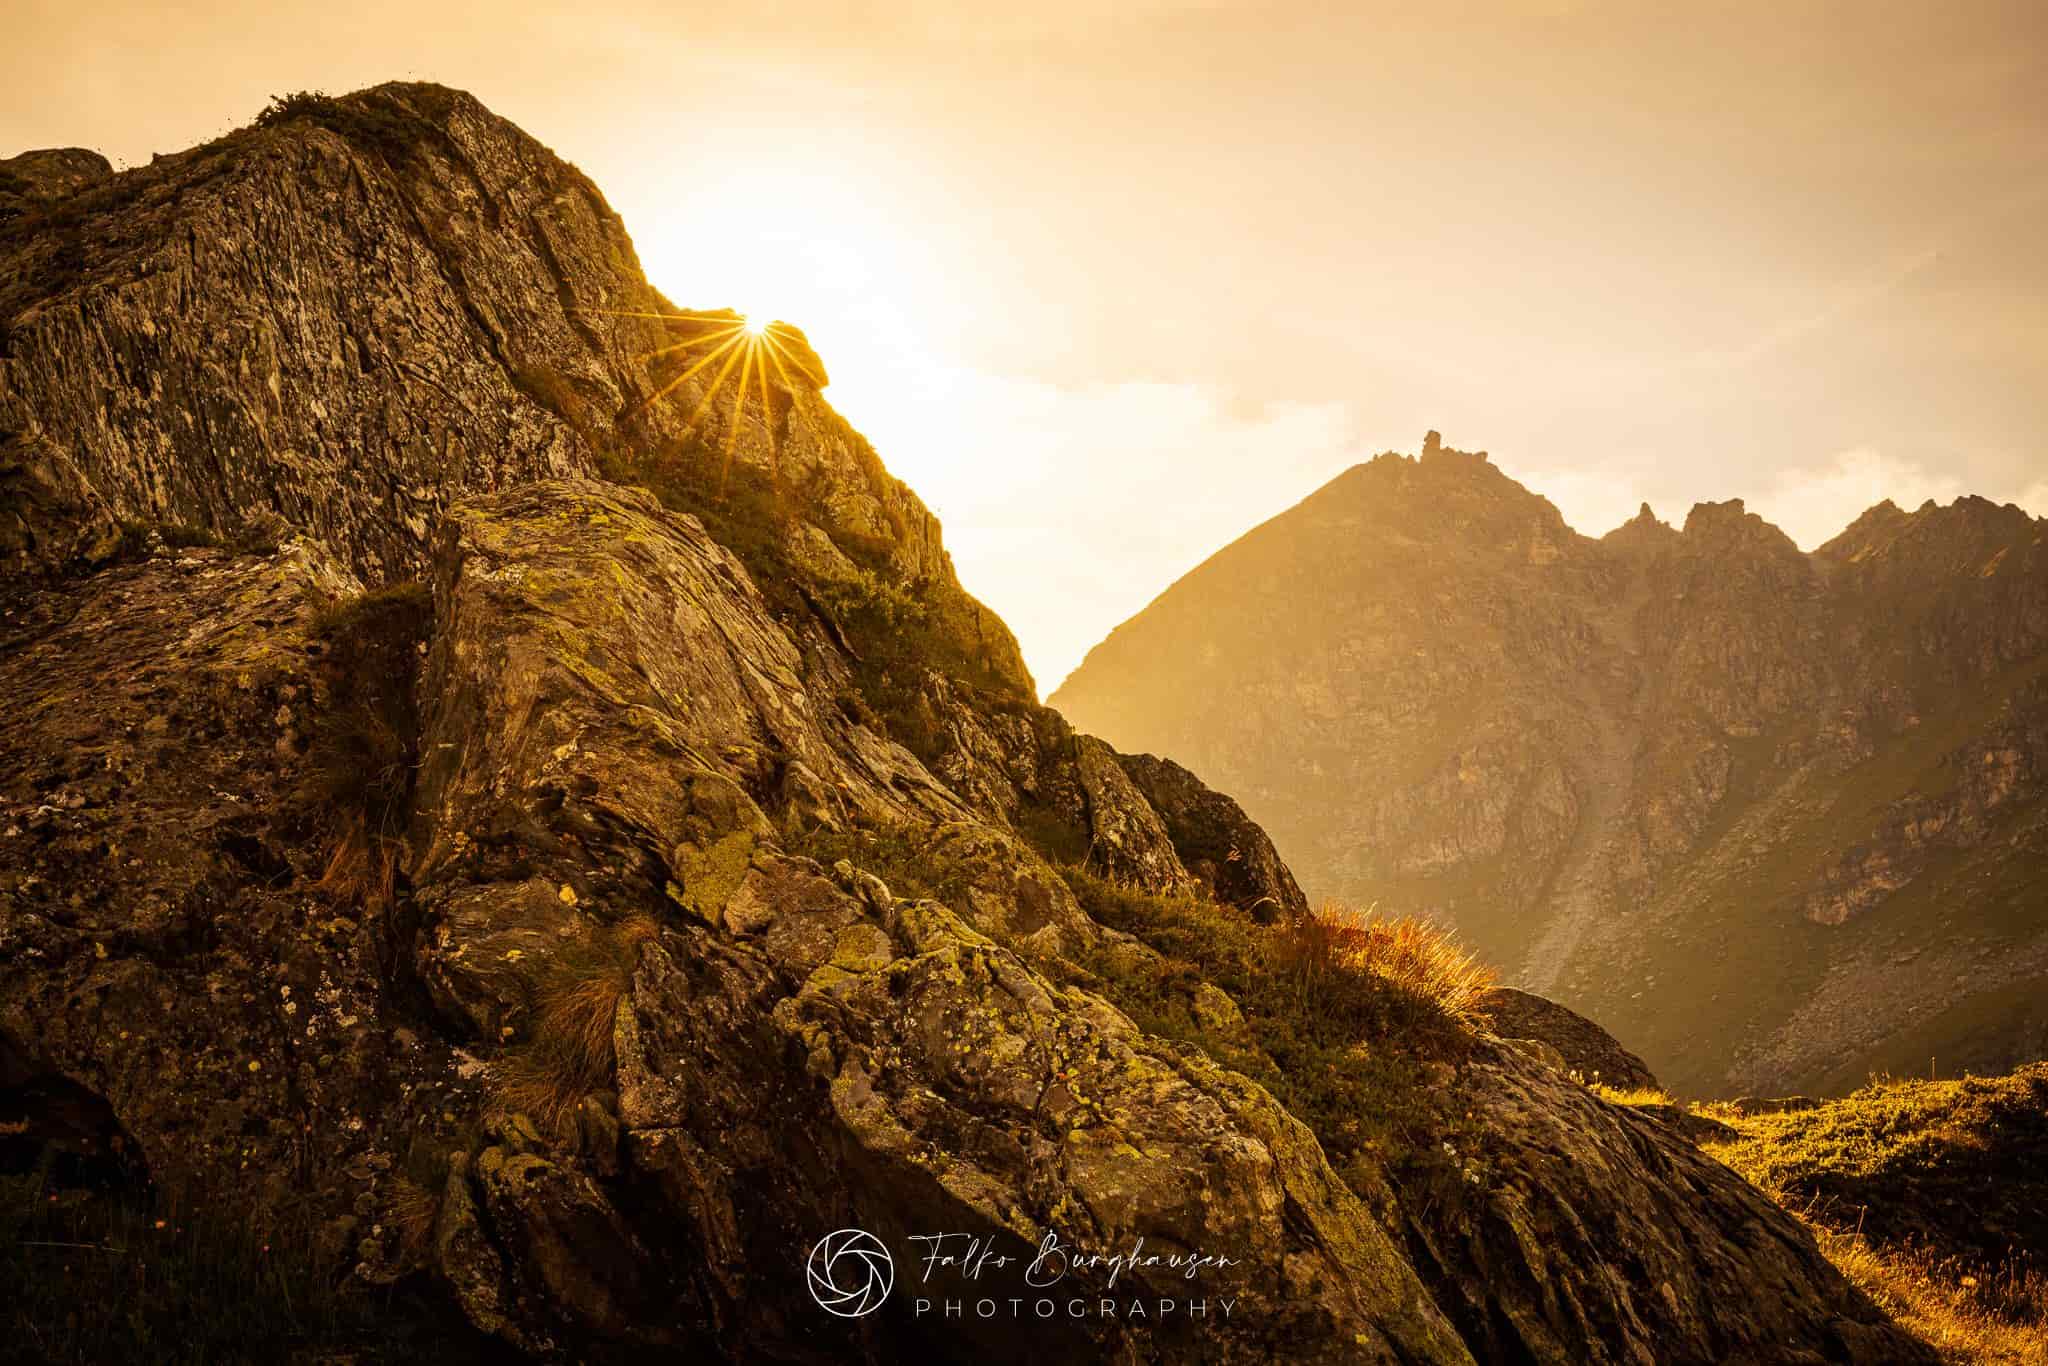
So, for example, on a hike at the light/shadow boundary, you could playfully try to create a sun star with the sun behind a ridge.
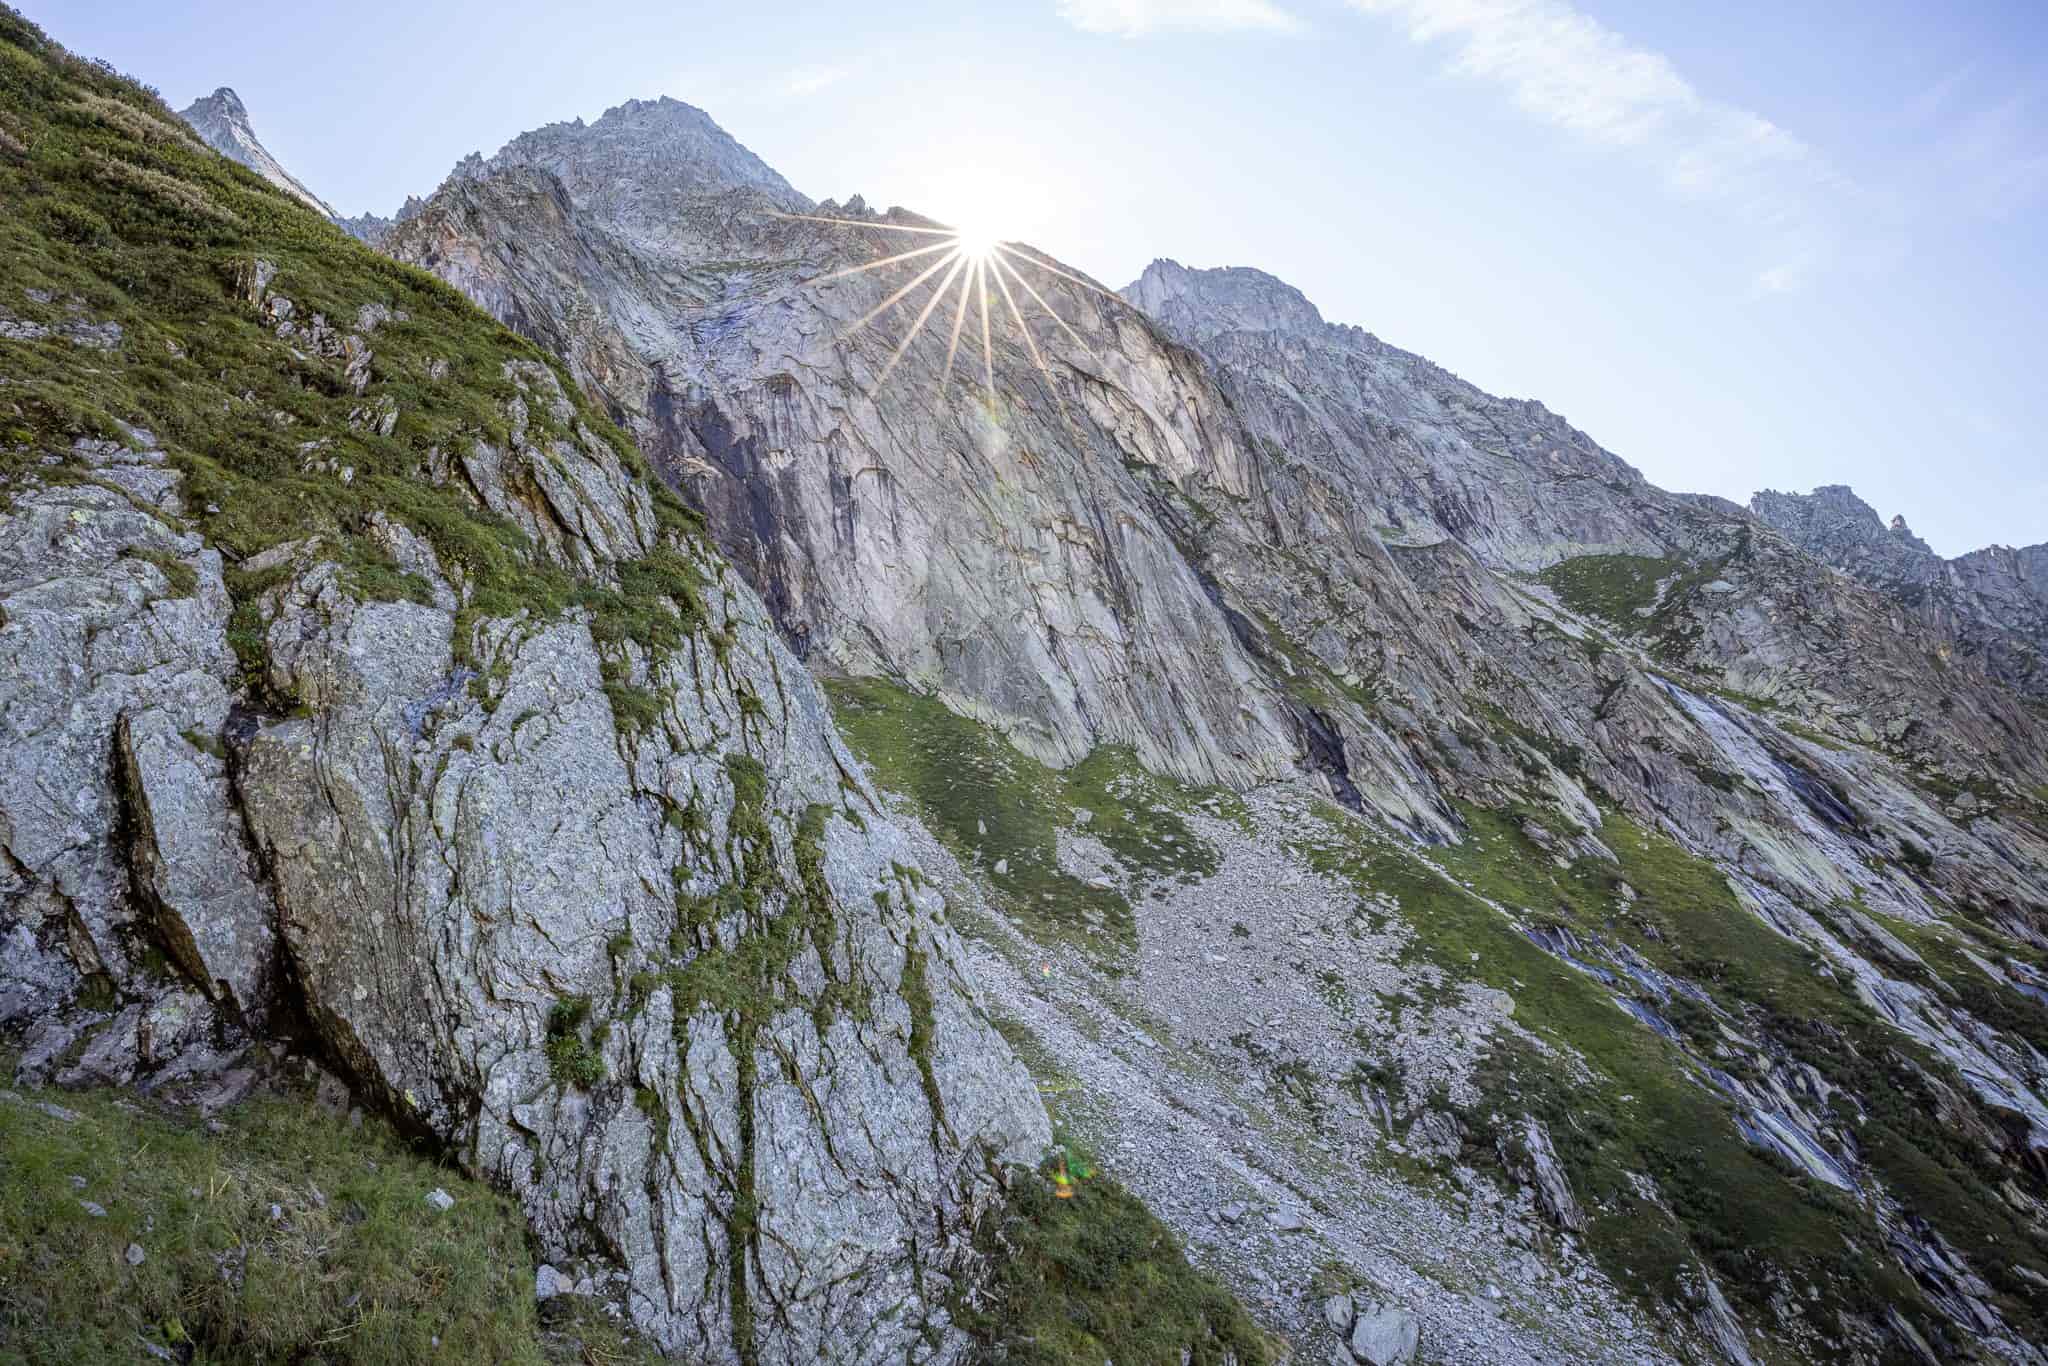
If you don’t want to make it so difficult for yourself right away, you can start with motifs where you can control yourself whether and how much the sun is blocked out by changing your position slightly. For example, on a hike at the light/shadow boundary, you could playfully try to create a sun star with the sun behind a mountain ridge. The next stage is then to catch the sun at a sunrise or sunset – but this is more difficult, as you really only have a few seconds to catch the ideal time. In this case, you need to make sure that all the other settings (subject search, focus, exposure, ISO and aperture) are already ready – otherwise things will get hectic.
If you then succeed in taking the photo, you will see that a sun star can create an interesting scene from a rather banal motif and you will have created an exciting photo with natural light. Have fun trying it out – I’m sure you’ll have your first successes after just a few tries.